Impala Forums banner

Starting 66 Impala restoration early June

15K views 22 replies 9 participants last post by  plano-doug  
#1 ·
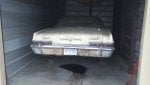
Going to start the project on my old high school 66 Impala around June 5 when I get back to MT. Here's a couple pictures of what I have to deal with, and a picture of my truck. All the parts are here, some in worse shape than others, except for the motor. I'll be putting in a strong 406 Chevy small block with a TH 350 that is presently in my 66 Pickup here in AZ. I plan on a 3 summer project, but hope for it to be finished by September 2015, but I'm sure it will take much longer than I anticipate. But, the journey is half the fun, if not more, so I will enjoy it.
First priority is pulling the body of the frame. I'm sure the body mount bolts are thoroughly rusted, so they will probably have to be cut off. Once the body is off, I plan to have the frame sand-blasted and powder-coated once it is completely dis-assembled. IF the frame is any good, that is.
You see, I bought this car June 1, 1979 (for $150). It ran, but used more oil than gas, so I had the original 327 (long gone now) rebuilt. I drove it through high school in MT, then in college, first in Bozeman, MT, then Phoenix, AZ. In December 1981, on the drive back for Christmas vacation, the guy driving it at that time (I was the passenger) put it in the ditch at the Craters of the Moon in southern Idaho. He managed to hit the right rear tire off a GINORMOUS boulder, which bent the panhard bar connecting the frame and the rear axle 90 degrees. Yes, it was a perfect right angle. We had it repaired, but ever since then the left rear tire was an inch or 2 closer to the fender than the right rear tire. I believe the frame was bent in the collision with the boulder, but possibly only the trailing arms were pushed out of whack.
My question is how do I check for a bent frame once the body is off? I've had a couple guys look at it over the years, and they said the frame looks ok, but before I haul it to a frame shop I would like to find out for myself. I would prefer to use the original frame if possible, so I will have it repaired if necessary. Thanks, and I will keep this thread updated often with my progress.
 

Attachments

#2 ·
Looks like a lot of fun in your future , good luck :beer:
 
#3 ·
:coolpics:.....Good luck with the rebuild! :beer: Just try not to forget to start a Restoration thread!!! :hope:

Post MANY pics!! :hope:

:eek:k3:
 
#4 ·
Started to remove the body yesterday, got all 10 bolts holding the body to the frame out. 5 of them came out without much problem, but the other 5 snapped off. Guess 48 years and 216000 miles will do that.
Lifted the body off the frame today, but only about 6 inches. I need some jack stands to lift it higher so I can roll the frame out from underneath, so I'll finish that up tomorrow.
Meanwhile, here's some pictures of what I have to start with. It's pretty rough, and I have a bit of a job ahead of me. But that's what makes it fun, right?
I have the front clip, hood, bumpers, etc, which I removed about 10 years ago, then I stored the old guy until now. Also I have the seats and the old powerglide. In fact, everything is still there in storage, except for the original 327 which is long gone. Next year I'll be putting in a 406 small block Chevy which is presently in my 66 pickup, along with the TH350. I am thinking of going with a 4 speed overdrive (700-R4 or 200-4R) but we'll see about that.
 

Attachments

#5 ·
I see I already mentioned the 406 I'm putting in. I will do a better job of trying not to repeat myself.
In the 3rd picture above you can see a 67 Suburban. Yep, that's mine too. Right now it has a tired 350 and the old truck 4 speed. Runs great though, starts everytime, 16 mpg on the highway. Not bad. Wonder how the 454 and TH400 will do when I put that in next summer? Probably not near so good, but it's hard to beat the big block cool.
My old Chevy 66 truck will be getting a Cadillac 472 and TH400 I'm working on this summer. Hopefully I can manage all 3 motor-and-tranny swaps next summer.
 
#7 ·
Here's a couple pictures of my 67 Suburban. I always liked these 3-door models, and when I saw this one for sale for $800 3 years ago I snapped it up instantly. Didn't even start it. Knew a screaming deal when I saw one. Good driving old beast. When I start working on this and my 66 Chevy truck I will be posting the progress on the 67-72 Chevy truck forums, if anyone is interested.
 

Attachments

#8 ·
Here's the frame after rolling it out from under the body. It's covered with surface rust, but appears solid enough. I had fears the frame had been bent when the car slammed into a giant boulder back in 1981, impacting directly on the passenger wheel and tire. But, it looks like the frame is ok, and any mis-alignment of the rear axle was from the trailing arms being bent, which is pretty obvious.
 

Attachments

#9 ·
Here's some more pictures of the frame and body of my Impala. The frame has been stripped completely and is now at the body shop, where it will get some minor repairs before being sand-blasted and painted. I decided to pass on the powder coating and get all the work done at one place. It should look pretty good in a week or 2. Also see the front and rear suspension components, which I am debating whether to clean up and re-use or replace entirely. The rear trailing arms aren't bent so bad, and can be straightened without too much trouble. But all new stuff would be pretty nice. All bushings will be replaced, of course, but I am also debating whether to go with the regular rubber bushings or the new polyurethane type.
 

Attachments

#11 ·
Just a quick update on what's been going on since I delivered the frame to the body shop. The frame has been cleaned and repaired (a couple rusty areas needed to be cut out and replaced, and a couple of the suspension mounting brackets were bent a little), and is going to be sand-blasted and painted next week. I have learned that things go very quickly when they are done personally, but when you must depend on others to do stuff it tends to take a while. To be expected - this body shop I am using does restoration work mostly, and he does have other projects ahead of me, so what can you do?
I have ordered new upper control arms for the rear suspension - the old ones were out of round pretty bad where the cups for the bushings went in. The lower control arms were fine, as was the panhard bar. New springs are also on the way, and new shocks will be installed as well.
As for the front suspension and steering gear, it is mostly all completely shot. I need new upper and lower A-arms, all new steering gear (center link, tie-rod ends, adjusters), springs, shocks, and strut rods. I had originally hoped to re-use all these parts, but 48 years and 200,000 + miles takes its toll on these things. Such is the way it goes.
I should have the frame and all the suspension pieces in another couple weeks, but I'll be traveling for a month or so so I won't get it all together until the middle of August. Should look pretty nice. Then I lower the body back on temporarily so I can get it to the body shop easily, where the body work will begin. This is expected to take most of the fall and winter, and will no doubt cost way more than I anticipated. But it will be done right the first time - this guy I have doing my frame and body is real good - so it'll be worth it.
 
#12 ·
Finally, the frame is done. It looks AWESOME. I will have pictures in a few days once I get the new suspension on.
Meanwhile, here's some pictures of the body on the way to the body shop. Also notice the doors, fenders, hood, trunk lid, and grill. All these pieces are in pretty good shape, except for the rear of the front fenders, which will need to have patch panels welded in.
It has been a slow process, and more expensive that I had anticipated. I have learned that is normal for a project like this, so if anyone decides to do a fairly complete restoration project, expect it to cost AT LEAST double what you plan on and to take AT LEAST twice as long.
It was quite the adventure doing all the work so far in a 10 x 20 storage unit near Columbia Falls, MT. And building the framework underneath the body and rolling it out of the storage unit onto the trailer on some 6 inch diameter fence posts was pretty cool too. Went very easy, didn't even need a winch, just pushed it up there.
 

Attachments

#15 ·
Here's the completed frame with most of the suspension installed, on it's way to the body shop to be temporarily re-united with the body so the body work can proceed and keep everything lined up properly. You might notice that the crosspiece on the rear of the frame is a simple U-Channel piece of steel, instead of the original crosspiece that had a depression on the top to clear the gas tank filler neck. The old crosspiece was a giant piece of rust, so I decided to replace it with the U-Channel piece of steel, since I won't be replacing the original gas tank, but will instead put a fuel cell in the trunk. Also the front upper and lower control arms, springs, and shocks are aftermarket items from performance online. Very nice. The rear upper control arms had to be replaced with some nice tubular units from umi performance. Also very nice. I am presently re-using the old lower control arms on the rear, since they were still in good shape, but may replace them with new ones later. Same with the Panhard bar.
You may notice wood blocks where the springs should be. I tried my hardest to get those springs in there, but I was utterly defeated. I'm spring-challenged I guess. I will leave that to Dave the restoration guy.
Also notice the old original wheels, well, 3 of them anyway. Where the other wheel went who knows, so the 4th wheel is from a 69 Cadillac. It's a good enough fit to roll the frame around the shop, but eventually I think I'm going to go with some Torque Thrust wheels that look similar to the old fake 5 spoke hub caps. I always thought they looked pretty sharp. The body will need a complete replacement trunk floor, 2 quarter panels, and some patch panels on the front fenders. Everything else looks ok.
I still need new steering gear and strut rods for the front end, as well as disc brakes. Will I need new spindles for front disc brakes?
As for the rear end, I will need a complete rear axle assembly - housing, axles, bearings, gears, brakes, everything. Moser wants upwards of $3000 for a ready-to-run differential, which seems a bit much. I'm hoping to find a used one and have it rebuilt for maybe half that, if possible. If not, I guess I'll have to bite the bullet and go for the Moser.
Dave the restoration guy has the body for the winter up there in Montana, while I am here in Arizona staying in the sunshine. He's promised to send me pictures as he works on the car, so I will post some as they come in. The project continues, slowly.
 

Attachments

#17 ·
Most of my frame is already boxed, except for behind the rear axle. I always understood this was done only for convertibles, but from what I have been able to find out all 65-70 frames were built this way. I could be wrong. Anyone with better info please feel free to let us know.
Only bad thing about a boxed frame is that you can't clean or paint inside the box section without an extreme amount of work. So even though my frame now looks all bright and shiny and new on the outside, inside the boxed section it's still the same as it always was.
 
#19 ·
It's been a few months, but the body work on the old Impala is about to start. First sandblasting all the old paint and rust off (which is a very precise thing to do on body panels, but Dave the restoration guy has been doing this for years), then the trunk floor and rear quarters to be welded in, then what minor body work that needs to be done, then finally paint. It has been a VERY slow process - it seems a big job came in to the shop that was for BIG bucks, so mine got sidelined for a while. But that's ok. Plus, Dave does his sandblasting outside, and you can't really sandblast something when it's snowing, so he's had to wait for quite a while to get a good clear low humidity day so that things won't start to rust before the whole body is done.
A question about paint, however. Dave has told me he will use PPG DBC base coat / clear coat in the original color, and while he hasn't quoted me a firm price for the paint, he says it may run to $3000 - $4000, which seems OUTRAGEOUSLY expensive. And this is just for the materials, not including his labor. Does this seem about right, or am I being upcharged for the paint? I know many shops add on a percentage for their parts and materials, but some don't, and while a reasonable upcharge is ok, I just want to make sure I'm not being taken advantage of. Any input is appreciated.
 
#20 ·
Here's the old Impala on the rotisserie with the body work being slowly done. Only some of the sand blasting has been done so far. Dave the restoration guy hurt himself, so things slowed down even more. Turns out the entire floor needs to be replaced as well as the trunk floor and the rear quarter panels. Lots of rust and pinholes. Also the piece between the rear window and the trunk lid needs replaced, as well as a whole new passenger front fender too. Once the sand-blasting started all kinds of new problems appeared. The rest of the car seems to be ok, at least I hope so.
In the meantime, now that I am back in Montana for the summer, I have been cleaning and repairing some old parts. Nearly finished with the instrument panel (speedometer, fuel gauge, and where the clock used to be, which is now going to house a tachometer), and just finished up the brake pedal assembly and bracket. Looking good. I'll get those pictures up soon.
 

Attachments

#23 ·
Here's the old Impala on the rotisserie with the body work being slowly done. Only some of the sand blasting has been done so far. Dave the restoration guy hurt himself, so things slowed down even more. Turns out the entire floor needs to be replaced as well as the trunk floor and the rear quarter panels. Lots of rust and pinholes. Also the piece between the rear window and the trunk lid needs replaced, as well as a whole new passenger front fender too. Once the sand-blasting started all kinds of new problems appeared.
That's a major buzzkill !!

I hope you haven't given up, but if you did, I'd understand why
Image


Doug

.