Impala Forums banner

My 63 impala 2 door build - with pics

1 reading
73K views 110 replies 28 participants last post by  rogerb  
#1 ·
Hey there

I'm in Melbourne Australia & have wanted a full size chevy for years.....

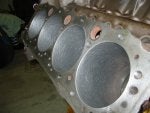
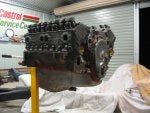
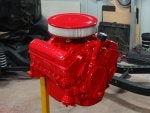
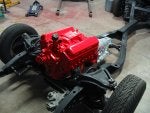
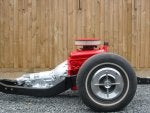
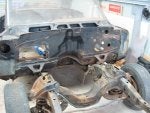
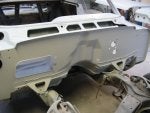
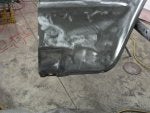
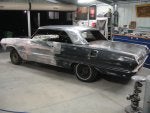
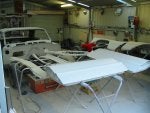
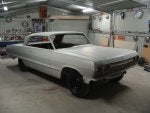
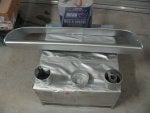
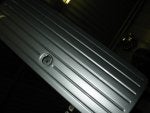
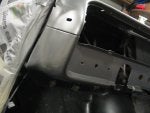
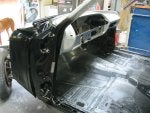
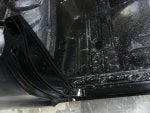
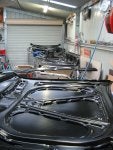
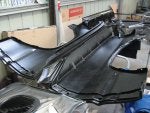
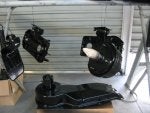
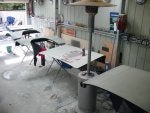
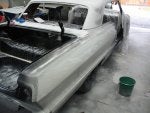
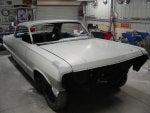
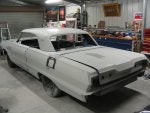
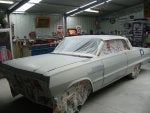
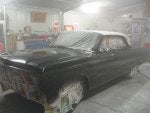
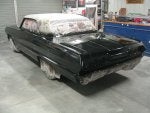
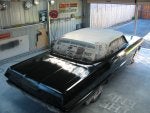
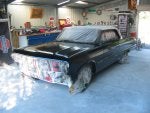
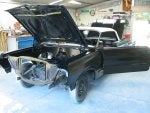
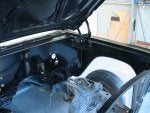
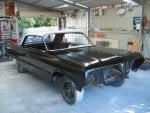
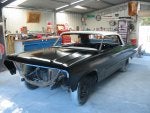
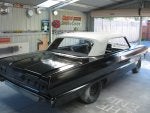
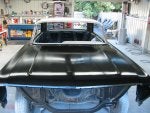
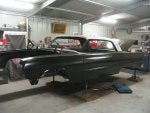
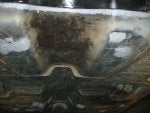
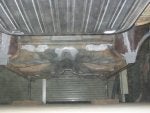
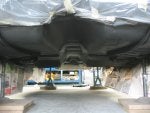
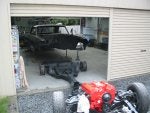
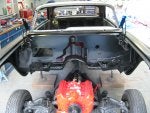
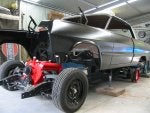
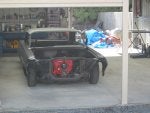
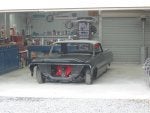
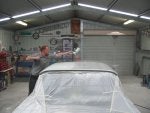
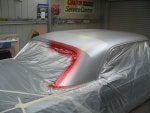
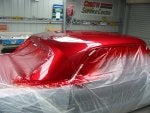
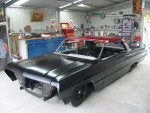
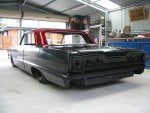
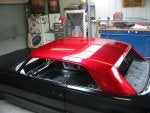
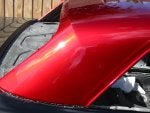
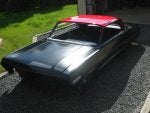
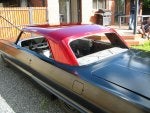
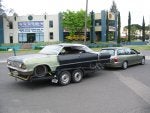
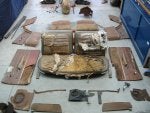
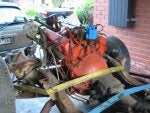
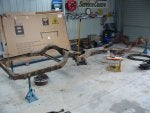
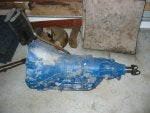
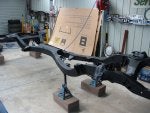
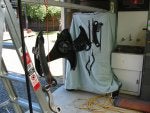
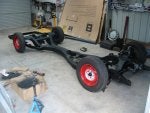
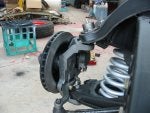
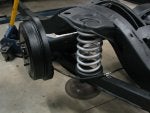
long story short i found an abandoned project in Sydney in November 08 and promptly purchased it. It was in a bad state of repair when it came from Texas (i believe) with heaps of rust and all worn out. The bloke i bought it from had put a complete replacement floor (front to back) and new rear quaters on it. He had also purchased 2 new doors & a new hood. Front guards & trunk lid also came from another donor car, so there is not much original 2 door left at this point. Here (hopefully) are some pics of what i got!
 

Attachments

#3 ·
For the sake of its history....

its a 1963 2 door hardtop impala.

factory black paint

factory brown interior with split bench in the front

factory 283 with 3 speed column shift

no power options (steering, windows, brakes, a/c)

odometer shows approx. 19799miles at the moment (dont know how many times that might have gone around)

I have no pictures, but i am lead to believe it was very rusty in the floor & rear quaters.... i have the doors & 1 guard and they are not too bad!?!

Purchased by the importer from Tennessee, according to the certificate of title.

car fabricated in Janesville, WI

Dunno how many of this combo were made, but if anyone knows any history on it i would be keen to find out!

Cheers!
 
#4 ·
First step in the road to recovery was to redo the suspension & brakes, so i set agoal to have the rolling chassis finished by 30 jan 09. I pulled the body off the chassis & chose the best of the two, the striped it bare & painted it & all the suspension arms. I replaced all the bushes & ball joints & all tie rod ends, idler & pitman arms. i had the steering box overhauled too! While i was at it i opened the diff & checked it, plus replaced the rear wheel bearings just to be sure. The brakes were junk, so i overhauled the rears & purchased a power brake kit for the front (inc drop spindles). In the mean time i had purchased a TH400 trans for it, so i fabricated a new cross member fot that too. I just made the deadline with one day to spare!
 

Attachments

#9 ·
Once i got the chassis all done, i moved onto the drive train. The 283 was a runner, but i wanted a little more! I bought a 350 to rebuild, wich was 60thou over once i opoened it up so i gave it a basic rings, bearings, & hone rebuild, with a mild cam. I have just bought a 650 holley for it & a set of block huggers. this will get it on the road, and we will see where it goes from there! i have taken a punt on the turbo 400 auto i bought & just bolted it up... fingers crossed! I missed my 30 March deadline to get this all done by two weeks, cause i was waiting on the tail shaft to be made.

The crank shaft stool is a side effect of too many junk parts sitting around! And somewhere to sit while i contemplate my project!
 

Attachments

#14 ·
Bringing my project up to where we stand now.... its been mostly body work. This is not my strong area. A mate of mine has given me heaps of help in this area, which i am very thankful for, but there is still a way to go yet! I decided to go for the flat look on the fire wall, so we modified the hell out of everything that comes through, or bolts to that. At the last moment i also decided to hide the wiper motor, so i found a smaller one & fabricated a bracked & modified the linkages so that it hides in the scuttle area. Am going to keep the factory heater box at this stage. The new pannels were not as easy as hoped, cause the lines are not the same as factory..... heaps of hours have gone into that, with more to come. The boot lid was rusty, so we repared that. the rest was mostly minor stuff. The car is now sitting in highfill primer, ready to go to a mate of mines panel shop. he will finalise all the lines, check it all over & then lay on the paint! In the meantime, i have been building a custom alternator, so that it can mount down low near the steering box..... i want the engine bay to look, clean, neat & very basic.
 

Attachments

#16 ·
Thats my garage in the backyard... i built the biggest damn garage my wife would let me!

her daily parks in the car port & her weekender usually parks in the garage with mine... but i kicked it out to build my chev!

so her weekender sits in the carport too.... and my daily sits on the street!

suits me fine!
 
#17 ·
Painted the dash of the car 2 weeks ago..... painted silver..... The dash pad will be retrimed to match the rest of the interior..... that is yet to be done.
Here are some pics....
 

Attachments

#20 ·
Thanks for the encouraging comments & good feed back guys.... helps to keep you motivated when people have nice stuff to say about what you are doing!

I found out a month or so back that we are expecting our first child! So thats very exciting and cool! it has also altered the time line slightly with my car, as i would like it finished to bring the kid home from the hospital in!

As a result i decided to paint the car myself. i'm no painter by any stretch of the imagination but the only painter i trust with my cars couldn't paint it for some time yet. I have never painted a car before! Also, as i bought the car in bits and it has all these new panels.... i thought a trial run / fit up might be handy.... just in case i need to modify anything after the fact, i dont have to hack up an expensive paint job!

So the decision was made to leave the lines as best as we could get em, and lay some color on it..... a 2 meter paint job so to speak (looks good from 2 meters - 6feet). plus i am not getting all the chrome redone yet.... so it'll have a bit of a rat look to it for starters..... i love owning a work in progress... allows you to develope it as you use it!

So my next posts - when i have time - will be the painting process....

Thanks again guys and i'll post some pics & details as soon as i can

Cheers
Simon
 
#24 ·
I actually bought a basic kit which was imported to Australia out of the states by a company here. The kit was the smaller power front disc kit, inc... booster, master cyl, proportioning valve, flexible lines, calipers , pads, rotors, bearings and drop stubs.... with all the fitting gear to go with it. This kit in my opinion offered very good value for money & would be cheaper over in the states - no freight to Aust. I bought the small kit cause i want to run the 14" wheels for a while. They only just clear some rims.

later i will probably use a complete diff assembly out of a later car that already has discs so that i get discs, LSD & a ratio of my choosing.

Thats the way i have done it.
 
#23 ·
68 Caprice

Hey I got a question about removing the body off the frame. I have 2 holes in my front passenger and driver side floor. otherwise they need to be replaced. Should I fix the floor before I take it off the frame? I'm worried about when i lift if off before i fix the floors will it twist and not line up right when i go to put it back down on the frame??
 
#25 ·
Hey I got a question about removing the body off the frame. I have 2 holes in my front passenger and driver side floor. otherwise they need to be replaced. Should I fix the floor before I take it off the frame? I'm worried about when i lift if off before i fix the floors will it twist and not line up right when i go to put it back down on the frame??
Hey there

From my experience the body seems fairly ridgid even when off the chassis.... if you are only patching the holes you will probably get away with it off the frame.... if you are doing floor pans, you might want to support both the frame & the body to eliminate movement. I didn't have to do any of this kind of stuff, cause all the floor & rear quaters were already done when i got my car.

Not much help... sorry..
 
#26 ·
So..... once i had decided to paint it myself, it was time to rip into it. with some help from a mate of mine, we ripped the car to bits (again!) and wet rubbed & then painted the fire wall, door jambs, boot jamb, inside of all the removable panels, hinges, etc... etc.... this process had its high & low points with a few stuff ups made along the way. Being the first car i have painted i have learned a few hard leassons along the way. oh, and repainted a few things too!

Here are a couple of pics of the progress.....
 

Attachments

#27 ·
So that i didn't have to paint all my bolts (which would mean cleaning em all first) i sent them away to get black zinc coated. The idea being it is easy to just brush touch them up later. The job done was not quite as good as i had hoped... the bloke said it was cause the bolts were old & some were a bit rust or had paint on them... but the new stuff i sent with them looked worse again i reckon. It will do the job i wanted however.

The next job was to wert rub the outside of all the panels & the body of the car. I envited a couple of mates over with a beer bribe to help get this done quickly. Once i got the bolts back we assembled the car (again!). we lined the panels up only sort of close as the body was still on my spare chassis at this stage.

With the stage set i masked the car & painted the outside the following Friday... all in all it worked quite well. being that i am painting in the garage there was some crap in the paint.... but i can live with that! As the car is painted Satain black there is no polishing.... so what i got is what i live with. its a fairly reasonable 2 meter job.... if i say so myself.

let me know what you think!
 

Attachments

#28 ·
Ok.... so those last couple of pics are straight off the gun... while the paint was still wet!

here is what it looked like a day or so later, once the paint had flattened off......
 

Attachments

#29 ·
The next stage of the process was to lift the body off the spare chassis.... clean, seal & paint the under side and then fit the body onto the correct chassis.....

Even though i had put the car on a hoist & pressure washed the whole under side when i first got it, this was a very dirty job! I used a brush on seam sealer then painted over the lot with stone guard.

I refitted the body to the chassis with a new body mount kit.

Now its starting to look like a car! Whooooo hoooo!
 

Attachments

#30 ·
So the last thing to do before assembly continues is to paint the roof..... i wanted to get the car down low so the roof was easy to reach. Turns out i didn't even have to take the springs out!

I have painted the roof House of kolor, candy apple red. As this requires a little more finesse to get a good result i had my painter friend come over and lay the paint on at my place.

I am very happy with the results!
 

Attachments

#35 ·
candy apple red paint


Hey i have been following your posts because you are staying a few steps ahead of me while I'm doing my 63 impala. my frame is completely done and its on wheels with the motor and trans all in. ive recently had the car stripped of its old paint and have began body work on the body itself. i finished smoothing the firewall a few days ago and im about done with the rear quarters (should be finished today) next is the fenders, hood, deck, and a few other pieces. paint is going to sneak up on me really fast and i have had my heart set on a bright red since the day i started this project until a few days ago when i saw what you did with the roof of your. that is the perfect color and i have decided to do the whole car in the candy apple red besides the rood which im thinking about finishing in a pearl white to give a candy effect. what can you tell me about the paint? how much did it cost you for the candy and silver base coats per quart along with the clear?
 
#32 ·
Thanks Bill

I finally got the car out in some sunlight the other week & got a few new pics. the Red roof really comes alive in the sun, here are some updated pictures.....

Seems most of my pics that i took are too big to post..... any hints on resizing them would be great......

Cheers
 

Attachments